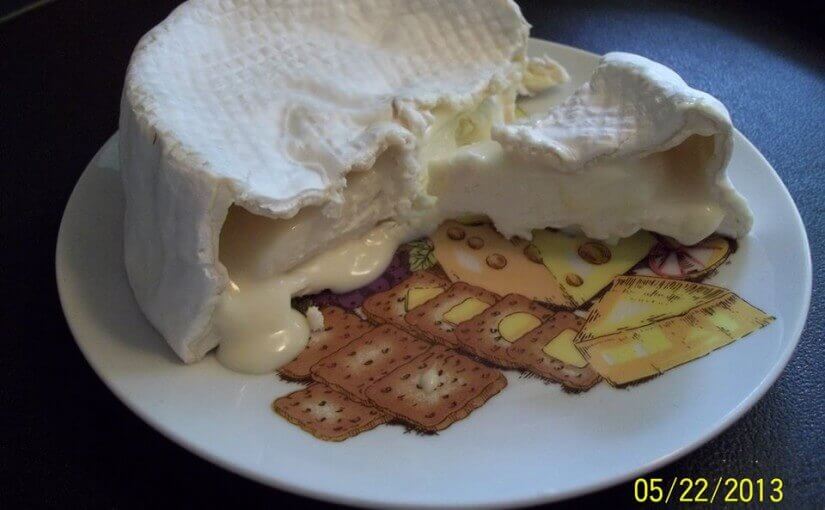
This recipe and photo are provided by Kalona SuperNatural™ whole milk fan, Debby Henke.
Ingredients
- 1/2 gallon Kalona SuperNatural™ whole, cream top milk
- 1/16 tsp mesophilic culture
- 1/32 tsp penicillium candidum mold culture
- 1/16 tsp calcium chloride
- 1/16 tsp liquid rennet
- 1 tsp non-iodized salt
- non-cholorinated water (bottled water)
Equipment
- Stainless cook pot
- Stainless slotted spoon
- cooking thermometer
- 2 small baskets to drain curd, about 4 inches across
- butter muslin, or other tightly woven cloth to line baskets
- draining rack
- draining container, optional
- plastic box, with lid for aging, about 8×8 inch
- plastic webbing (like is used in needlecrafts)
Directions
- Sterilize the equipment either by washing in a mild bleach solution and allowing to air dry, or boil for 10 minutes.
- Warm milk to 85F. Be sure all of the cream is incorporated back into the milk. Remove from heat.
- Sprinkle mesophilic and penicillium cultures over surface of the milk and allow to rehydrate for about 5 minutes. Gently stir cultures into the milk.
- Dilute the calcium chloride into about 2 oz of water. Stir solution gently into the milk.
- Dilute the rennet into about 2 oz of water. Stir solution gently into the milk.
- Cover the pot and allow to sit, undisturbed for 1 and 1/2 hours. Wrap the pot in a thick towel to keep warm. The curd will coagulate during this time.
- Check for a clean break by making a small cut in the curd, sliding the knife under the cut with flat side up, then lifting up under the cut. If the curds separate cleanly, go to next step. If not, allow another 15 minutes for curds to set.
- Using a long-bladed knife, cut the curds all the way through to the bottom of the pot, into 1 inch sections. Turn the pot and cut across to make 1 inch checkerboard pattern. Hold the knife at an angle, cut the curds into cubes, turning the pot as you cut. Allow to sit for 5 minutes.
- Gently stir the curds for about 10 minutes, taking care not to break them up. Let the curds settle to the bottom of the pot after stirring.
- Line draining baskets with the cloth. Set the baskets on the rack to hold up out of the accumulating whey. Place the rack over a container or bowl to catch the whey.
- Spoon the curds into the lined baskets. If the baskets are full before you have used all the curds, allow to drain down a bit, then continue adding the curds.
- As the whey drains, the curds in the baskets will shrink. When there is room, combine all the curds into 1 basket. Do not press or squeeze. Allow the curds to drain under their own weight.
- Drain for 2 hours. Turn the curd mass over in the basket by lifting up the cloth and carefully rolling the cheese over in the basket. Drain 2 hours and turn the cheese again. Allow to drain overnight, so that total draining is about 24 hours.
- Cut the plastic webbing to fit in bottom of the aging box. Remove cheese from the basket and cloth and pat it slightly dry with paper towel. Place cheese into the box on top of the webbing. Sprinkle 1/2 tsp of non-iodized salt over top of cheese. Allow to sit 15 minutes. Turn the cheese and sprinkle with remaining 1/2 tsp of salt. Cover the box with the lid.
- Age the brie at 50-55F. This can be done in wine cooler or refrigerator that can be regulated to this temperature range. Normal refrigerators are set to about 38-40F which is too cold to allow the cheese cultures to work.
- Turn the cheese over daily. With a paper towel, wipe out any whey or moisture that has collected in the box and on the webbing.
- Within 7-10 days, a fuzzy white coating, which will be the rind, will begin to form on the surface of the cheese.
- By day 12 to 14, the cheese should be fully covered in the white mold rind, wrap the cheese in a layer of waxed paper, return to the aging box and continue aging. Continue to turn the cheese daily, wiping out any excess moisture. Replace the waxed paper if it becomes damp.
- Continue to age for a total of 21-28 days. Allow the brie to come to room temperature for serving with mild crackers or bread.

Homemade Brie
Description
This recipe and photo are provided by Kalona SuperNatural™ whole milk fan, Debby Henke.
Ingredients
Scale
- 1/2 gallon Kalona SuperNatural™ whole, cream top milk
- 1/16 tsp mesophilic culture
- 1/32 tsp penicillium candidum mold culture
- 1/16 tsp calcium chloride
- 1/16 tsp liquid rennet
- 1 tsp non-iodized salt
- non-cholorinated water (bottled water)
Instructions
- Sterilize the equipment either by washing in a mild bleach solution and allowing to air dry, or boil for 10 minutes.
- Warm milk to 85F. Be sure all of the cream is incorporated back into the milk. Remove from heat.
- Sprinkle mesophilic and penicillium cultures over surface of the milk and allow to rehydrate for about 5 minutes. Gently stir cultures into the milk.
- Dilute the calcium chloride into about 2 oz of water. Stir solution gently into the milk.
- Dilute the rennet into about 2 oz of water. Stir solution gently into the milk.
- Cover the pot and allow to sit, undisturbed for 1 and 1/2 hours. Wrap the pot in a thick towel to keep warm. The curd will coagulate during this time.
- Check for a clean break by making a small cut in the curd, sliding the knife under the cut with flat side up, then lifting up under the cut. If the curds separate cleanly, go to next step. If not, allow another 15 minutes for curds to set.
- Using a long-bladed knife, cut the curds all the way through to the bottom of the pot, into 1 inch sections. Turn the pot and cut across to make 1 inch checkerboard pattern. Hold the knife at an angle, cut the curds into cubes, turning the pot as you cut. Allow to sit for 5 minutes.
- Gently stir the curds for about 10 minutes, taking care not to break them up. Let the curds settle to the bottom of the pot after stirring.
- Line draining baskets with the cloth. Set the baskets on the rack to hold up out of the accumulating whey. Place the rack over a container or bowl to catch the whey.
- Spoon the curds into the lined baskets. If the baskets are full before you have used all the curds, allow to drain down a bit, then continue adding the curds.
- As the whey drains, the curds in the baskets will shrink. When there is room, combine all the curds into 1 basket. Do not press or squeeze. Allow the curds to drain under their own weight.
- Drain for 2 hours. Turn the curd mass over in the basket by lifting up the cloth and carefully rolling the cheese over in the basket. Drain 2 hours and turn the cheese again. Allow to drain overnight, so that total draining is about 24 hours.
- Cut the plastic webbing to fit in bottom of the aging box. Remove cheese from the basket and cloth and pat it slightly dry with paper towel. Place cheese into the box on top of the webbing. Sprinkle 1/2 tsp of non-iodized salt over top of cheese. Allow to sit 15 minutes. Turn the cheese and sprinkle with remaining 1/2 tsp of salt. Cover the box with the lid.
- Age the brie at 50-55F. This can be done in wine cooler or refrigerator that can be regulated to this temperature range. Normal refrigerators are set to about 38-40F which is too cold to allow the cheese cultures to work.
- Turn the cheese over daily. With a paper towel, wipe out any whey or moisture that has collected in the box and on the webbing.
- Within 7-10 days, a fuzzy white coating, which will be the rind, will begin to form on the surface of the cheese.
- By day 12 to 14, the cheese should be fully covered in the white mold rind, wrap the cheese in a layer of waxed paper, return to the aging box and continue aging. Continue to turn the cheese daily, wiping out any excess moisture. Replace the waxed paper if it becomes damp.
- Continue to age for a total of 21-28 days. Allow the brie to come to room temperature for serving with mild crackers or bread.
Notes
Equipment Needed
- Stainless cook pot
- Stainless slotted spoon
- cooking thermometer
- 2 small baskets to drain curd, about 4 inches across
- butter muslin, or other tightly woven cloth to line baskets
- draining rack
- draining container, optional
- plastic box, with lid for aging, about 8×8 inch
- plastic webbing (like is used in needlecrafts)
- Category: DIY, ingredient
- Cuisine: American
